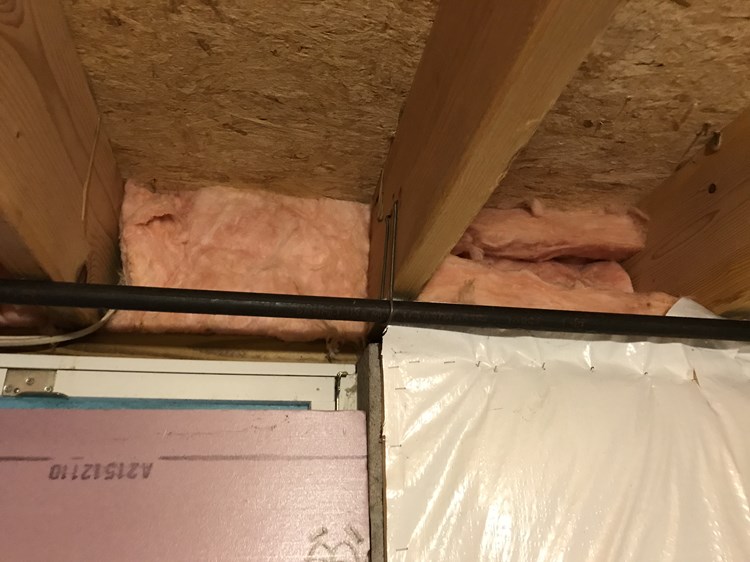
It's a good time to make sure your Rim Joists in your basement are properly air sealed to prevent cold air (or hot air in the summer) from seeping through cracks or uninsulated rim joists. They say air leakage can can account for around 40% of the heat lost in a typical house, and bad or uninsulated Rim Joists are a major source of that heat loss and air infiltration, which means your energy bill could be way more expensive than it needs to be. After properly sealing your rim joists, there's a good chance you're houses temperature will feel noticably more comfortable all the time, and your furnance or air conditioner will turn on less often, which means it may last longer since it won't be working as hard.
In the summer of 2019, I finally decided to take the initiative to properly air seal the Rim Joists in my basement and open concrete block sill plate area, that were letting in tons of cold air or hot air, along with many unwanted critters. In the last few years, I started getting mice in my basement, which then made a home in my attic. In the winter I'd hear them scurrying across the ceiling in my bedroom. I also started noticing mice droppings in the basement. Then in the summer, I would have random bees, ants, (once) cluster flys and the worst house centipedes were getting into my house. Unbeknownst to me at the time, these rodents and insects were getting in through holes and cracks in my Rim Joists.
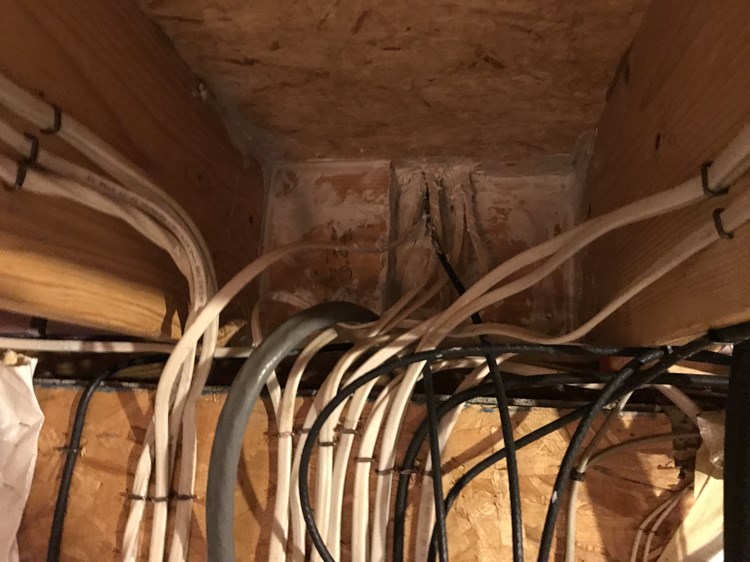
After removing the fiberglass bats that the home builder had stuffed into the rim joists (which provide almost 0 insulation) and inspecting each rim joist, I finally discovered all the little holes and cracks that existed where I could see daylight coming through. Anywhere, electric lines, plumbing, gas or cable lines are coming into a house, there's a good chance your home builder didn't air seal the holes, which means bugs and other critters may be able to easily make there way into your basement. I found huge holes by my electrical box in the Rim Joists and in the concrete block where the main electrical line came in that rodents could easily get into my house. In my house, I had the additional problem of also needing to close the top of the concrete block wall where the sill plate rests, as half of the concrect block was open at the top and letting in cold air or hot and humid air from the outside in as well.
So in order to get started here are the materials you need to properly air seal your Rim Joists and achieve an R-33 value:
I also needed to seal the opening at the top of my basement concrete block foundation wall, that the sill plate rests on, here are additional materials I used:
Keep in mind, just be sure to follow the building code requirements for insulating rim joists for your area if you decide to DIY. I may have spent around $400+ to properly seal up and insulate my rim joists and it was totally worth it. I spent most money on GREAT STUFF PRO Gaps & Cracks 24 oz Insulating Foam Sealant, which I needed to use a lot of it to seal around the Foamboard, and also to seal the top opening in the concrete block foundation, which was blowing out hot air in the summer, and cold air in the winter. All in all, my house is more comfortable now, I NO longer have a rodent problem, house centipede problem, random bee or ant problem. I also saved over $100+ in gas and electric bills in my first year with the door to my basement being fully opening all year long, while running my heat in the winter 5 degrees warmer at 70 degrees vs. 65 degrees in prior years, and my air condioner a few degrees colder in the summer. My furnance and air conditioner run less often, which means they will last longer now. All in all, it's probably one of the best investments you can make in your home if you plan to live there for 3+ years or more (I just wish I had done it 15 years sooner, when I first moved in).
Before you get started, check to see if you have any dryer venting ducts or air ducts obstructing your rim joists, because you may need to take the air ducts apart to properly insulate that portion of your rim joists, and if it's during the winter months when you need to run your furnance you will not want to turn off your heat for very long while you work. You'll likely also have water pipes, gas pipes, electrical lines and other nails or bolts you'll need to work around.
So with that said, here's how to Seal and Insulate Basement Rim Joists:
1) Remove any old pink Fiberglass bats that may be stuffed into the rim joists.
2) Clean / Vacuum out each rim joist to remove all dust, mice droppings, spider webs etc. Kill any Mold that might be growing with a mold killer spray.
3) Now use Alex Plus 10.1 oz. White Acrylic Latex Caulk Plus Silicone and Disposable gloves to fill and seal all four edges of each rim joist. Caulk edges all around each Rim Joists to seal up any holes and cracks.
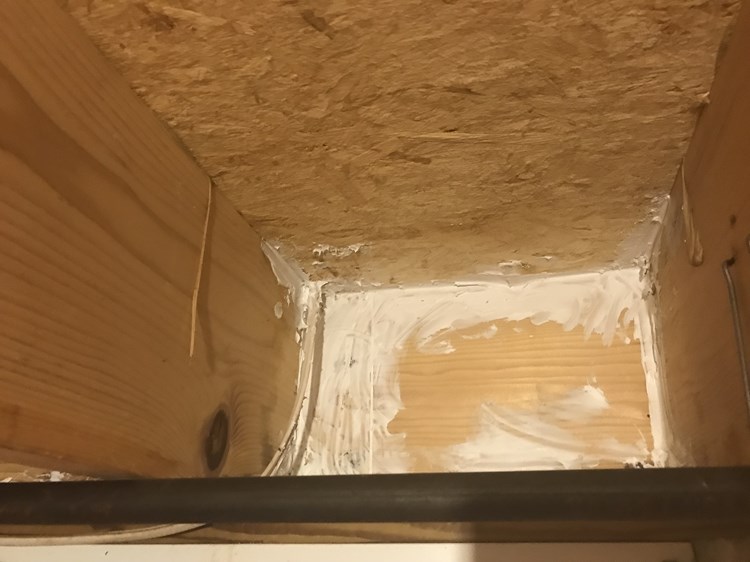
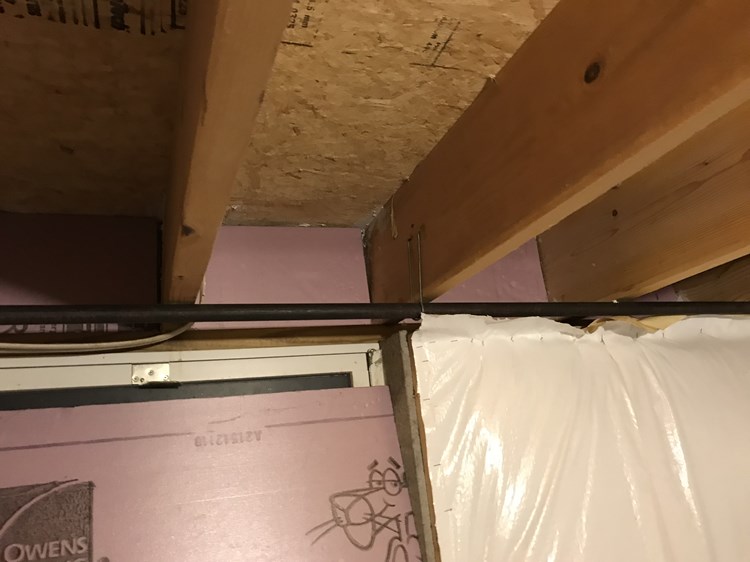
See below: This Rim Joist had a huge gap where two rim joists came together, and likely let in lots of insects and critters. Needed to use a lot of caulk to fill in big gaping holes.
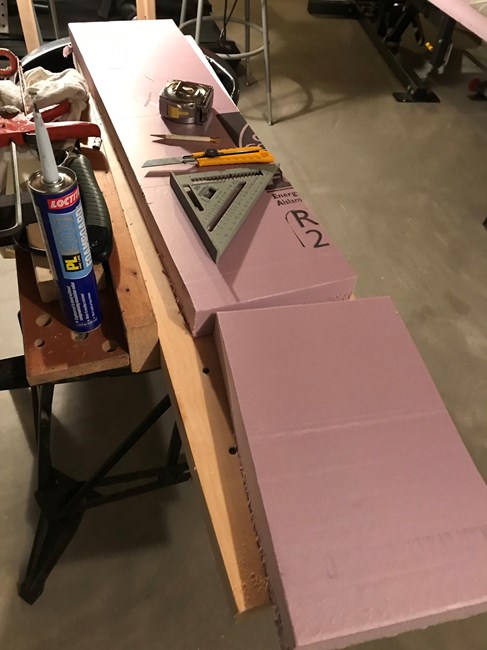
4) Measure and cut 2" XPS Foamboard to fit into each Rim Joist space.
Reduce your measurement to leave at least 1/4" to 1/2" gap on each side of Foarmboard, so that it's easier to spray foam the edges to seal up the gaps with Gaps & Cracks 24 oz Insulating Foam Sealant. I think a 1/2" gap is easier for the Gaps and Cracks Foam Sealant to work into.
Note: It may be easier to use the edge of a table to snap the board after cutting through most of the foam (rather than trying to saw / cut through the entire 2" of foamboard). I used a OLFA 5003 L-1 18mm Ratchet-Lock Heavy-Duty Utility Knife to cut the foarmboard, and recommend getting extra blades.
5) Put a little Loctite PL 300 Foamboard VOC Latex Construction Adhesive on the back of the cut pieces of Foamboad to help them stay put and place them into the Rim Joists, you should have 1/4" to 1/2" gap around all four edges.
Note: For the record, this was my first attempt at using the Dispensing Foam Gun, and I know it doesn't look pretty (luckily it gets hidden by the Rockwool insulation). I would say, use less than you think you need at first, as the foam will expand quite a bit.

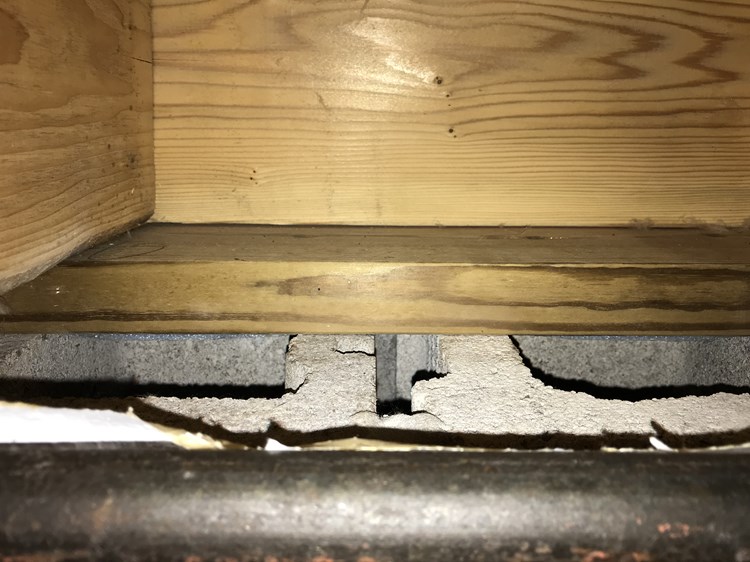
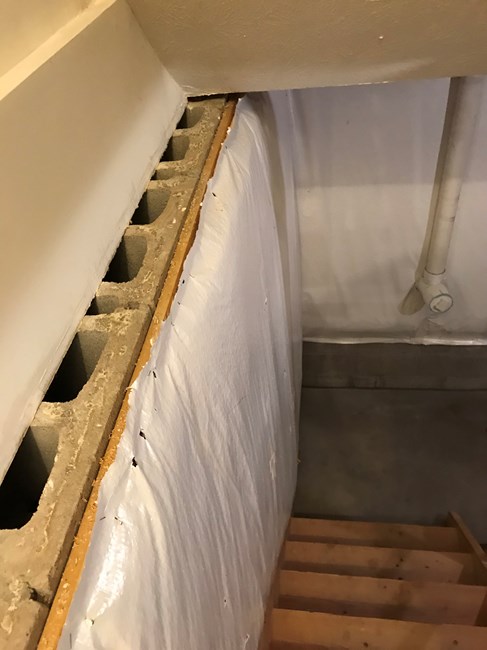
7) OPTIONAL: I needed to fill in the top of my concrete block foundation, as this was letting in tons of cold air and hot air.
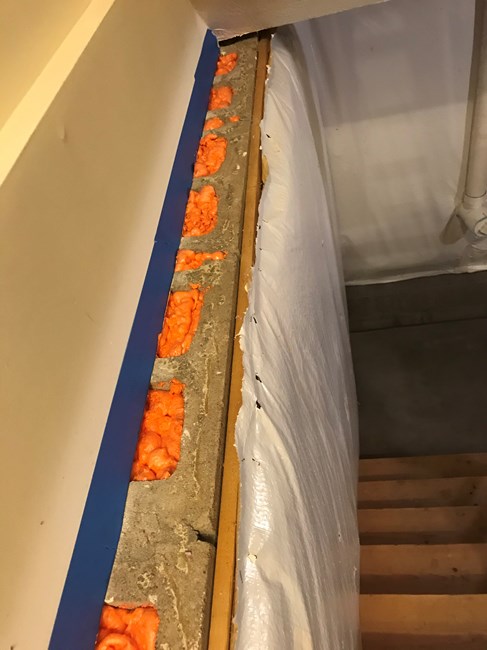
For whatever reason my homes sill plate did not extend the entire concrete block foundation. So what I did was to first cut up small pieces of 1" XPS Foamboard and stick them into the top of the holes of the concrete block in order to take up space, before using Gaps and Cracks foam sealant to seal the top.
After filling the holes of the concrete block up with pieces of XPS foam, I then used Gaps and Cracks to seal the top. I then cut the top of the Gaps and Cracks orange foam that may have come up above the concrete block, so that it is flush with the top of the concrete block.
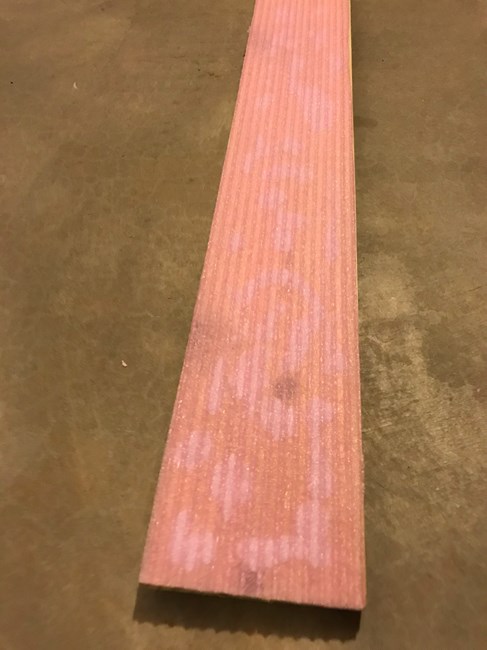
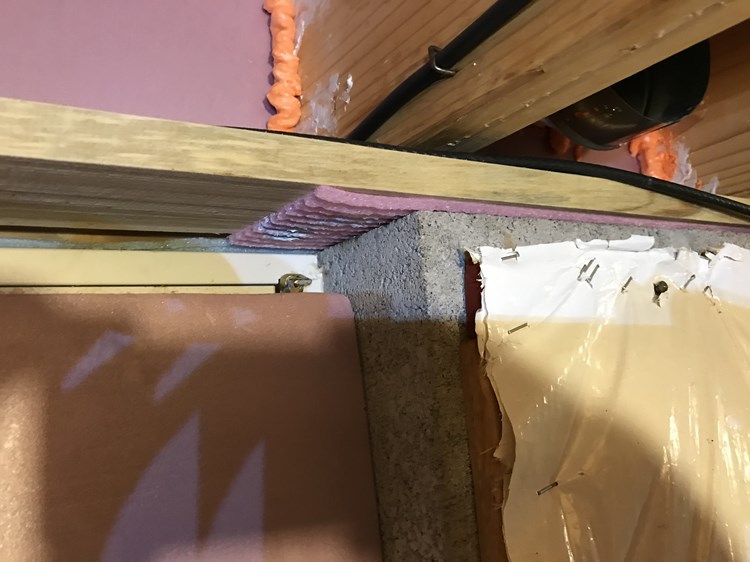
Next I put a Sill Plate Gasket onto the bottom of 1 in. x 6 in. x 8 ft. Ground Contact Pressure-Treated Board, using Loctite PL 300 Foamboard VOC Latex Construction Adhesive. I cut board so that it was the same width as the exposed concrete block wall. Then use the Loctite PL 300 on top of the concrete block before putting the board over the top to seal up the top.
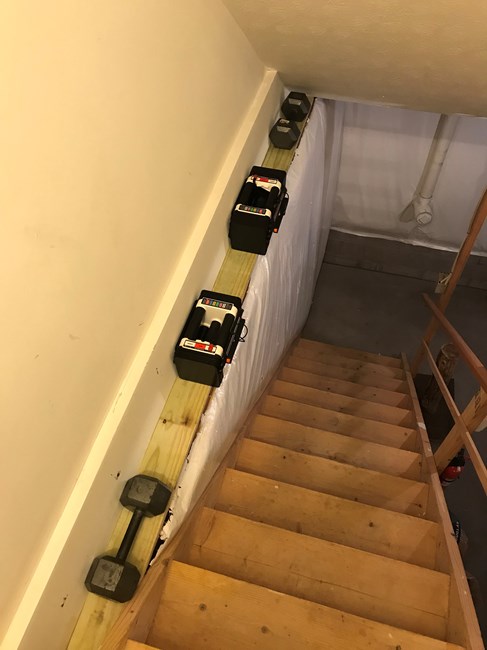
I held down with pressure treated board on top of the concrete block with free Weights.
Where I couldn't use weights to hold down the pressure treated board, I used wedges to keep board in place while the adhesive bonded.
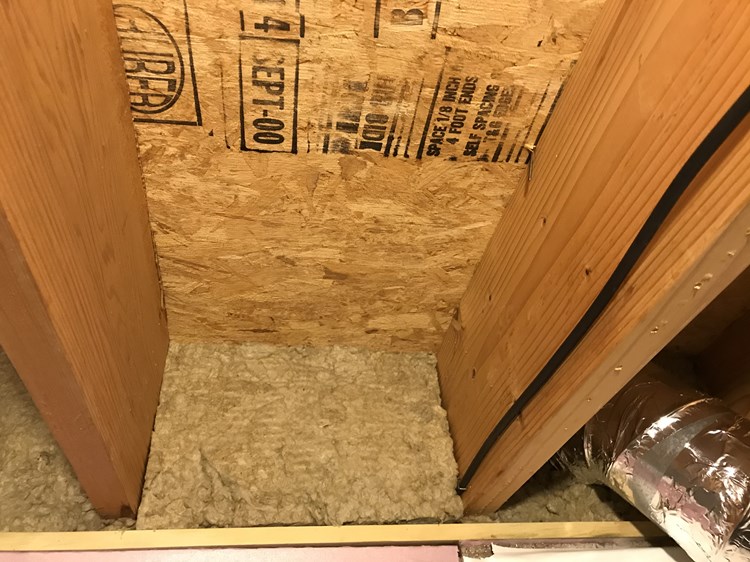
8) Lastly, measure and cut Rockwool Insulation to fit snuggly into each Rim Joist.
I used 5.5" think Rockwool insulation, which just went to the edge of my concrete block foundation wall. You'll want to cover the XPS foamboard with Rockwool in order to get better insulate value, but also due to building Fire codes, since Rockwool is fire resistant up to 2150 Fahrenheit and building codes typically don't allow for having exposed XPS foamboard. Lastly insects won't tunnel through or nest in Rockwool, because they will get torn up while trying tunnel into the material.
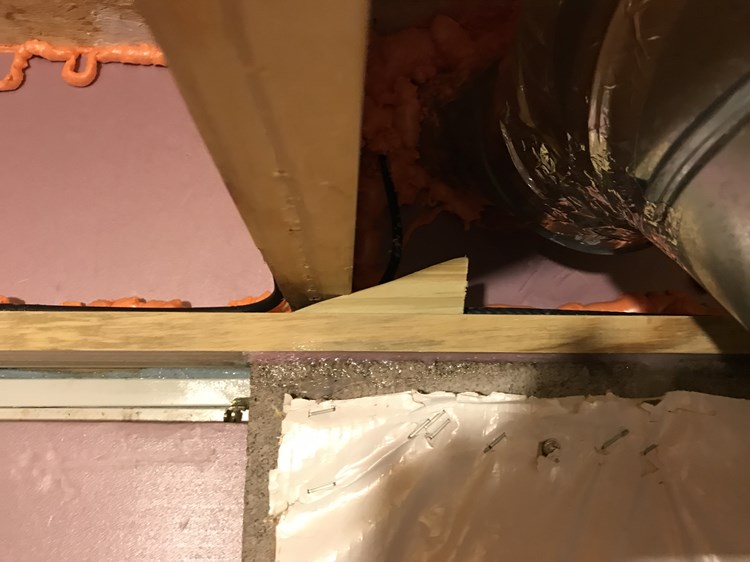
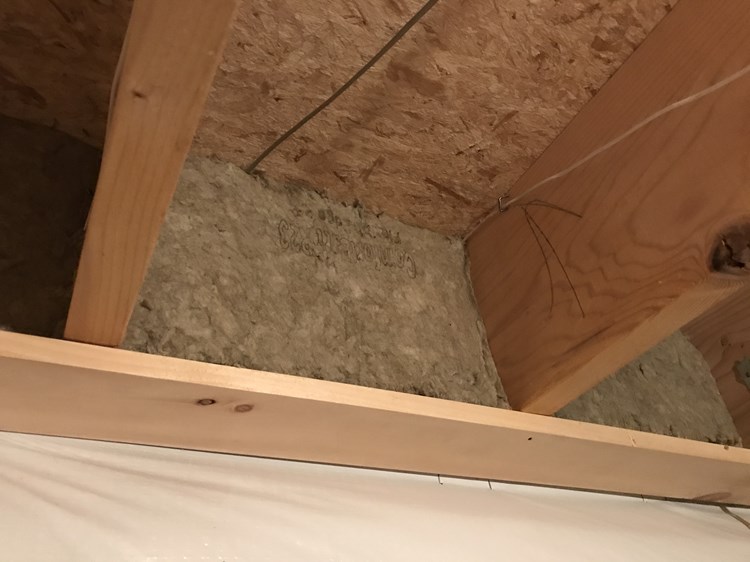
NOTE: The one section of Rim Joists in my basement that didn't have the exposed concrete block foundation wall for Rockwool to rest on, I screwed in 1" pine board onto the rafters, so that I could still rest 5.5" Rockwool onto the board and have it cover over the top of 2" XPS Foam board.
Hopefully that helps you save some money on your heating and cooling bill.
To save even more, you'll want to seal up all your air ducts, and any air gaps around your furnance. I used Red Devil 0841DX F-Seal 181 Fiber Reinforced Water Based Duct Sealant, 1 Gallon, Gray and HVAC Multi-Purpose Foil Tape to seal up all my return ducts, heating ducts, and furnance. Now my furnance isn't leaking unwanted hot or cold air into my basement, and wasting needless energy.
NOTE: If you still have mice getting into your attic after sealing up your rim joists, it's likely they are getting in through the garage, and up into the drywall / studs. Be sure to seal up around the floor of your garage. Garage doors always seem to have small openings for mice to get through (either on the side or underneath).