How to Insulate a Basement Dryer Duct to Save Heat and Lower Energy Costs
Steps for insulating a basement exterior wall where dryer duct exits house in order to save heat and reduce energy costs.
by
Doug
Updated July 16, 2020

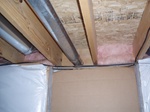
No insulation around dryer duct.

Closeup - No Insulation in exterior basement rafter.

Foam Insulation and Aluminum Foil Tape

Gaps around aluminum duct filled in with Insulating Foam.

Aluminum tape wrapped around duct to cover any additional areas that may let in cold air.

Cut insulation to fit around dryer duct using a utility knife.

Finished insulation around Dryer Duct.
Disregard the article below... as it's NOT the best way to insulate your Rim Joists.
------------
The other day I was in my basement and noticed a cold breeze emenating from what I thought was the basement window. After further examination, I discovered that the cold air wasn't blowing in through the window, but just above the window where the duct for my dryer exits the house. Not only were there gaps around the dryer duct where cold air was rushing in, but there was also a space just below the dryer duct where cold air was seeping into the basement as well. Taking a closer look around my basement, I noticed that every other space at the top of the exterior wall in the basement where the the 2x12 floor joists met where all filled in with pink fiberglass insulation, except the spot where the dryer duct exited the house and cold air was coming into the basement.
I'm really not sure if the fact that there was no insulation around the dryer duct is due to some sort of building code or safety concern, but I do know that this area was letting in a lot of cold air, which meant I was having to use up more gas to heat the house, thus making my energy bill more expensive. So to combat this winter heating problem, I went ahead and sealed up the gaps and insulated the area as best I could to reduce my heating and energy costs. Here are the steps I took to insulate this exterior wall of my basement where the dryer duct exits the house:
- On a windy or cold day, check your basement for any areas where cold air may be coming in. You will want to feel for leaks around windows, floor joists, electrical outlets, exterior doors, vents and air ducts). Also, be on the lookout for spiders and spider webs (if there is a web, then there's most likely a draft nearby). Another technique that can be used is to light a stick of insense and hold it up near any suspected leaks and watch the smoke trail.
- In my case, I found leaks around the floor joists and the dryer air duct. This allowed me to first use insulating foam sealant called "Great Stuff" to fill in the gaps and cracks where cold air was rushing into the basement. The foam sealant expands quite a bit after a few minutes, so you really don't need to use a lot it at first. After spraying the foam wait at least an hour for it to harden and dry.
- Now wrap the areas where you sprayed the insulating foam with aluminum foil tape. The aluminum foil tape helps add an second layer of protection and seal things up nicely.
- Lastly, get a piece of fluffy batt insulation (exterior walls commonly use R-13 to R-21 batts) and use a utility knife/ razor blade to cut the insulation to fit the space you need to fill in.
- Use gloves to handle the insulation and gently push the batt into the wall cavity. Make sure the edges and corners are filled, then fluff the insulation out so that it fills the whole area in the wall. It should fit snuggly in place, but if you have a large batt, then use a staple gun to staple the insulation in place.
- That's it! You're all done!
By using the foam insulation sealant, along with the aluminum foil tape and the batt insulation I was able to triple protect my basement from cold air flowing in through the gaps near my dryer air duct. This quick little insulation job, should now help my basement stay a little bit warmer, while making my house more energy efficient and help keep my heating bill down.