How to use OpenOffice Impress
Slide shows add a professional graphical approach to any presentation in any topic. OpenOffice Impress is a useful free tool to create them.
by
Roger
Updated April 26, 2012
What is Impress?
Impress is a presentation software that is delivered with the free OpenOffice suite of programs. It can be downloaded free of charge, and can open presentations created in PowerPoint. Apart from Impress format, you can save your presentations in several formats such as PPT, PDF or HTML.
How to start with Impress?
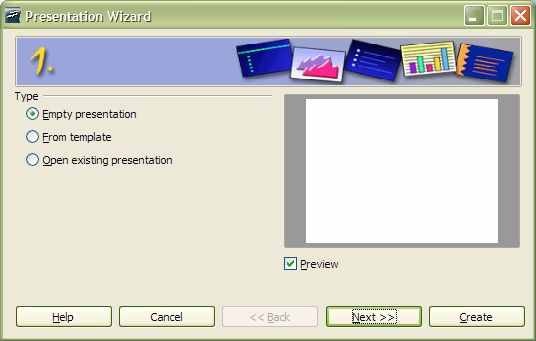
- The first time you open the application, the Presentation Wizard will appear:

- Choose, whether you want to open an empty presentation, an existing template or open an existing presentation . There are two templates in Impress, one for introducing a new product, another one for Recommendation of a Strategy. Now choose the Empty presentation option. Click Next.
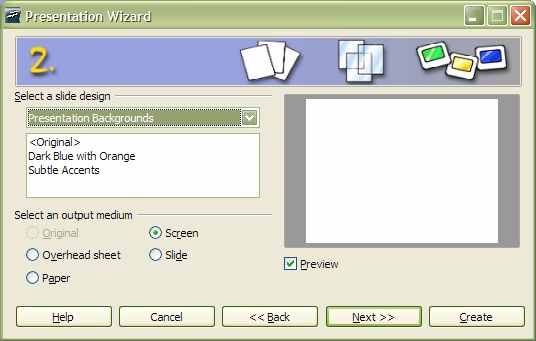
- You may select a slide design if you want. There are two free backgrounds in Impress you can choose from. In case you do not select any of them, the presentation will have a background slide. Now start with a blank presentation.

- You can choose output options like screen, overheads or paper. If you need a regular presentation, accept the default which is Screen. Click Next.
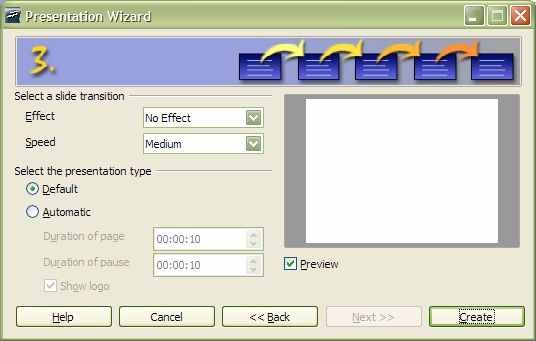
- As next, slide transition and timing options are shown. You can select the options right now, but you can modify them later. Click Create.

- Your blank Presentation appears. You will see the following:
-
On the left you can see the Slides pane with thumbnail views of the slides.
-
The working area is in the middle. You can edit your slides there.
-
There is the Task pane on the right. When you start your presentation, it displays the various slide layouts. At the bottom of the task pane you can see Master Pages, Layouts, Table Design, Custom Animation and Slide Transition options at the bottom of the Task pane.
-
The Standard toolbar is located at the top of the screen. It contains command icons like New, Open, Cut, Copy, Paste and an icon to export the presentation to PDF format.
-
The Presentation toolbar can be found next to the Standard toolbar.
-
The Line and Filling toolbar is under the Standard toolbar. With the help of its icons you can, for example, edit graphic elements like lines and arrow styles, and fill colors.
-
You can see the Drawing toolbar at the bottom of the screen. This includes text options, flowcharts, callouts, common shapes, etc.
- Now click on the triangle pointing to Layouts in order to see the options. Select the slide layout that is suitable for your purpose. By hovering the mouse over the thumbnail, the screen tip shows you which type of slide you are pointing to. If you will make up your mind later on, you can select a different layout or just manually change or delete objects on the slide. Presentations usually begin with a Title slide. Enter the text you want.
- Save your presentation. You can save it either using the menu: File > Save as, or with the Save button of the Standard toolbar. The good old CTRL + S combination works here as well. Select the folder you want to save in and give the presentation a name.
- Now add a new slide to continue your presentation. You can add new slides using Insert > Slide from the menu bar, but you can also use the Presentation toolbar next to the Standard toolbar. Click the Slide button on the Presentation toolbar and select a slide layout from the thumbnail views. The Title and Text slide is used very often, it suits every presentation. The text field contains jot points listed as bullet points. When you click on the suitable layout, a new slide will be added.
- Enter text. After a bullet point is typed, press Enter to start a new bullet.
- Save your nice new presentation. Again, you can use the menu File > Save, the Save button of the Standard toolbar or CTRL + S.